
One of the parts of the build I’ve actually gotten to start working with a little is the power supply.
For my build, I’m not planning on using a heated bed. This will currently limit me to printing with only PLA plastic, but I’m fine with that for now. Since I’m not using a heated bed, which typically draws a large amount of power by itself, I’m free to use a cheaper, more readily available power source. After reading up on it in the Delta forum and other RepRap related sites, I decided to use an XBOX 360 power supply.
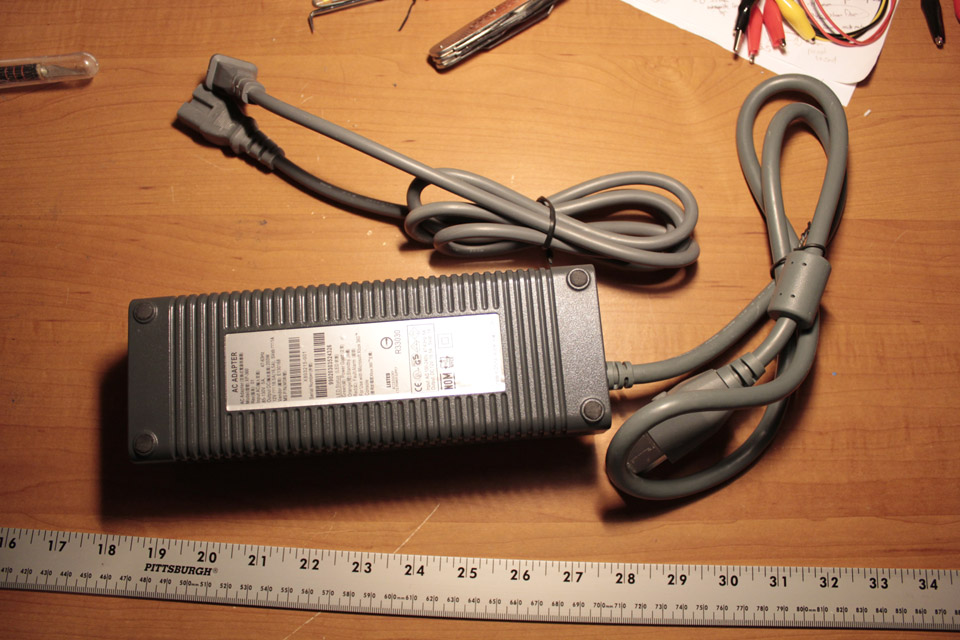
Here’s what showed up from Amazon. A knock-off XBOX 360 power supply; 203watt. Capable of outputting 16.5amps at 12volts.
The original XBOX 360 power supply is a 203 watt model. It outputs 12 volts, which is what my chosen printer takes to operate, and can give up to 16.5 amps. That should be ample power for a printer without a heated bed. It *might* power a heated bed if the power draw is small enough but that’s something I’m not planning on testing right away.
**Heads up: There are 3 different kinds of XBOX 360 power supply. 203 watt, 175 watt, and a 150 watt. Other than the label, there is an easy way to identify them. I give an example later on in a graphic that makes it pretty clear.**
I searched my local craigslist for adapters and had no luck, so I ordered mine from Amazon.com. I checked and double-checked to make sure I was getting the 203 watt model as I had read some angry reviews of people expecting this model and getting a weaker one. I have a link for the one that I purchased in my BOM, but here it is too:

So, the PSU’s will likely come from a variety of sources if you buy them online. Mine was a pretty convincing Chinese knock-off. I’ve checked it all out. For all intensive purposes it will work just fine. The only difference is this doesn’t have a Microsoft logo or brand name on it anywhere. No biggy.
Another thing I quickly noticed… This was very much a “used” power supply. It was listed as “new”. Now, let’s be honest here. For the price I paid, I wasn’t expecting new. As long as it worked, I’d be happy. But what gave it away for me was this:
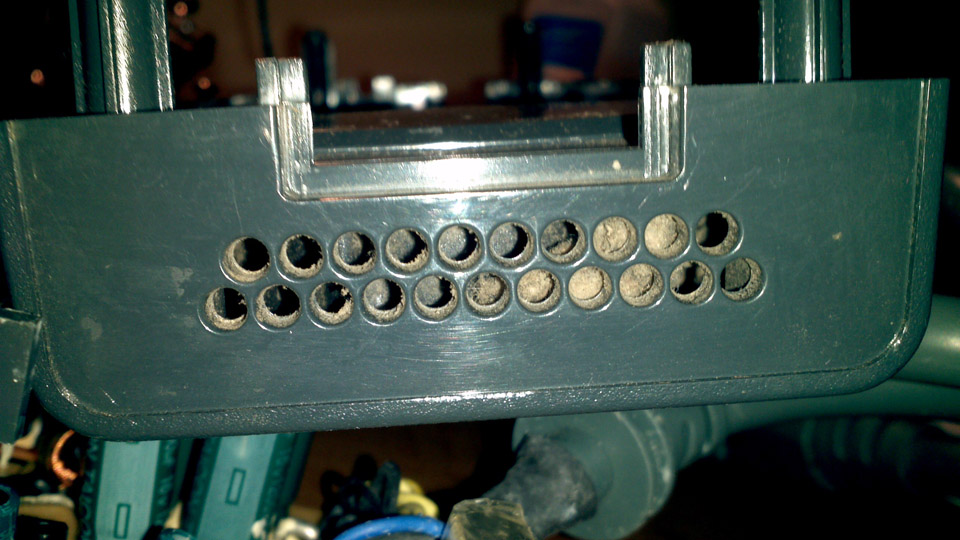
Aww, it comes with a free dust bunny!
A little loose ball of dust clearly visible through the vent holes. Hmm. No reason to live with that, right? So I opened it up and cleaned it out. Turns out, it needed it pretty badly.
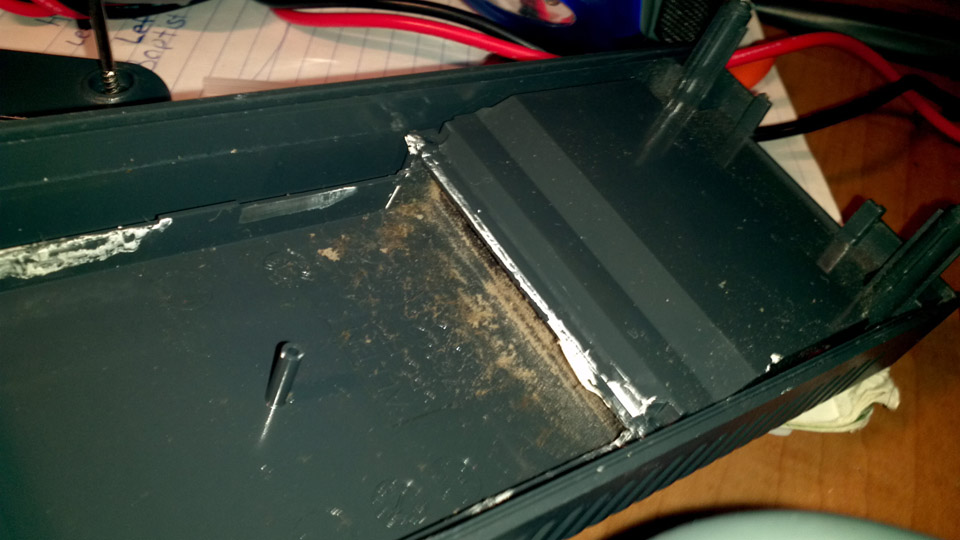
This is where the fan butts-up against the heatsink.

Clearly it was in need of a cleaning…
You can click on those to see the larger versions in all their glory. 😀
So, I took the PSU outside and hit it with vigorous amounts of compressed air. In my haste, I didn’t take an “after” picture, but suffice it to say it looked MUCH better. Fortunately it was loose dust (not owned by a former smoker) and it cleaned off really well. Dust ball removed, I put it all back together and it’s functioning well.
So, for some people, they choose to just use the Power Supply as is. They cut off the proprietary XBOX connector at the head, strip the wires, and have at it. If you’re one of those people and this is your first time trying anything like this, I recommend you check this site out:
http://www.instructables.com/id/How-to-turn-an-X-Box-360-PSU-into-a-12v-lab-PSU/
This is a great tutorial on exactly what you need to do to use just the adapter as a power supply. If you go this route, I must suggest you put a switch in between the +5v line and what he calls the “jumpstart” line. This will give you an easy way to turn the supply on and off, and keeps it from being “always on”, unless that’s what you’re going for.
While searching for more information on using the XBOX Adapter as a supply, I saw another forum user’s suggestion in this topic:
https://groups.google.com/forum/?fromgroups=#!searchin/deltabot/xbox/deltabot/suRLdd-yPN0/-ux5FeI_XhMJ
He had found an adapter that converted the original XBOX360 power supply to the newer XBOX360 Slim models. More importantly, the adapter had the female side of the proprietary XBOX connector. This appealed to me for cable-management reasons. I could simply plug in my adapter instead of having to solder or bolt the adapter directly to my controller board. So, I looked it up. For $4.00 I thought, “Eh, what the hell.” and added it to my cart. It’s also in the BOM, but here’s the direct link from Amazon.com:
Power Supply Convert Adapter Cable for Xbox 360 Slim

This was the first thing I started testing on. No one had tried this method before and I wanted to make sure it was going to be able to transfer the full power of the XBOX360 PSU through it.
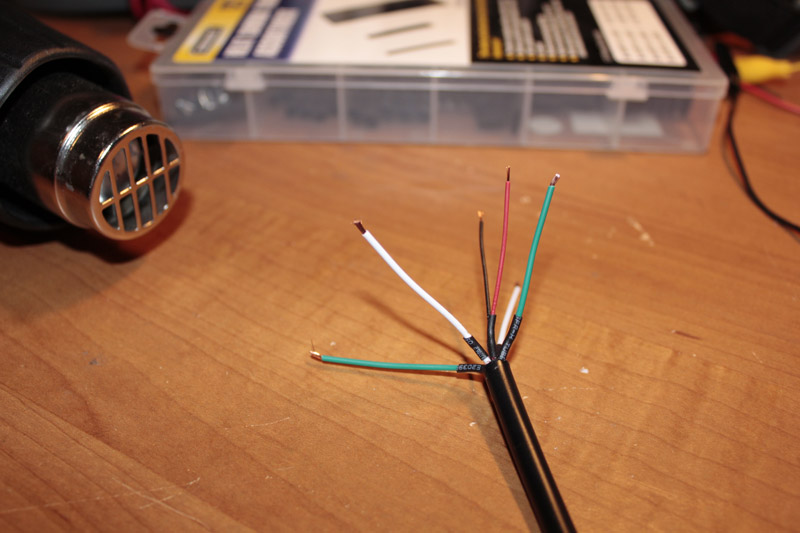
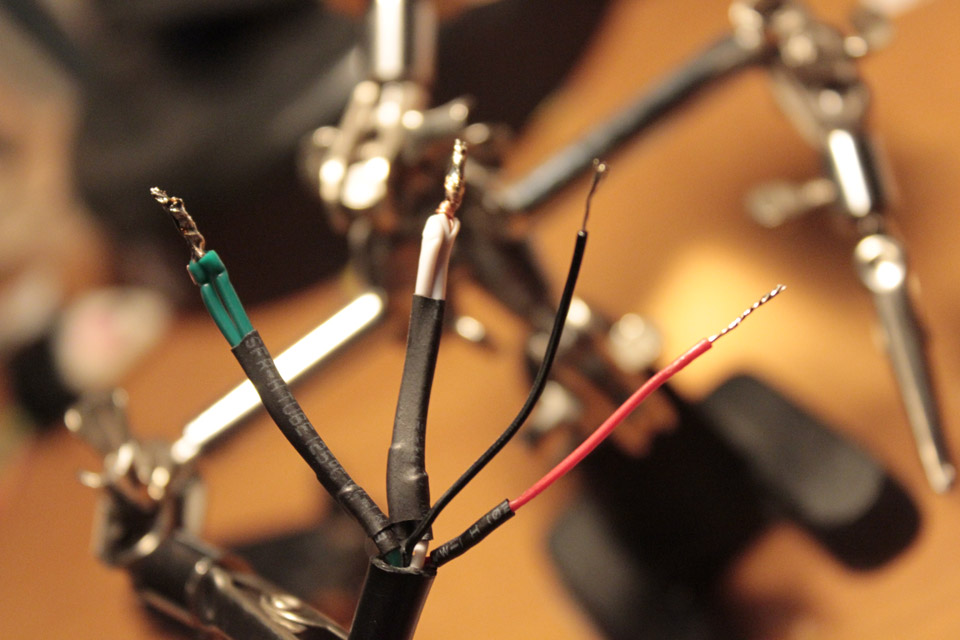
So, first things first, I cut the XBOX-Slim side of the Adapter off.
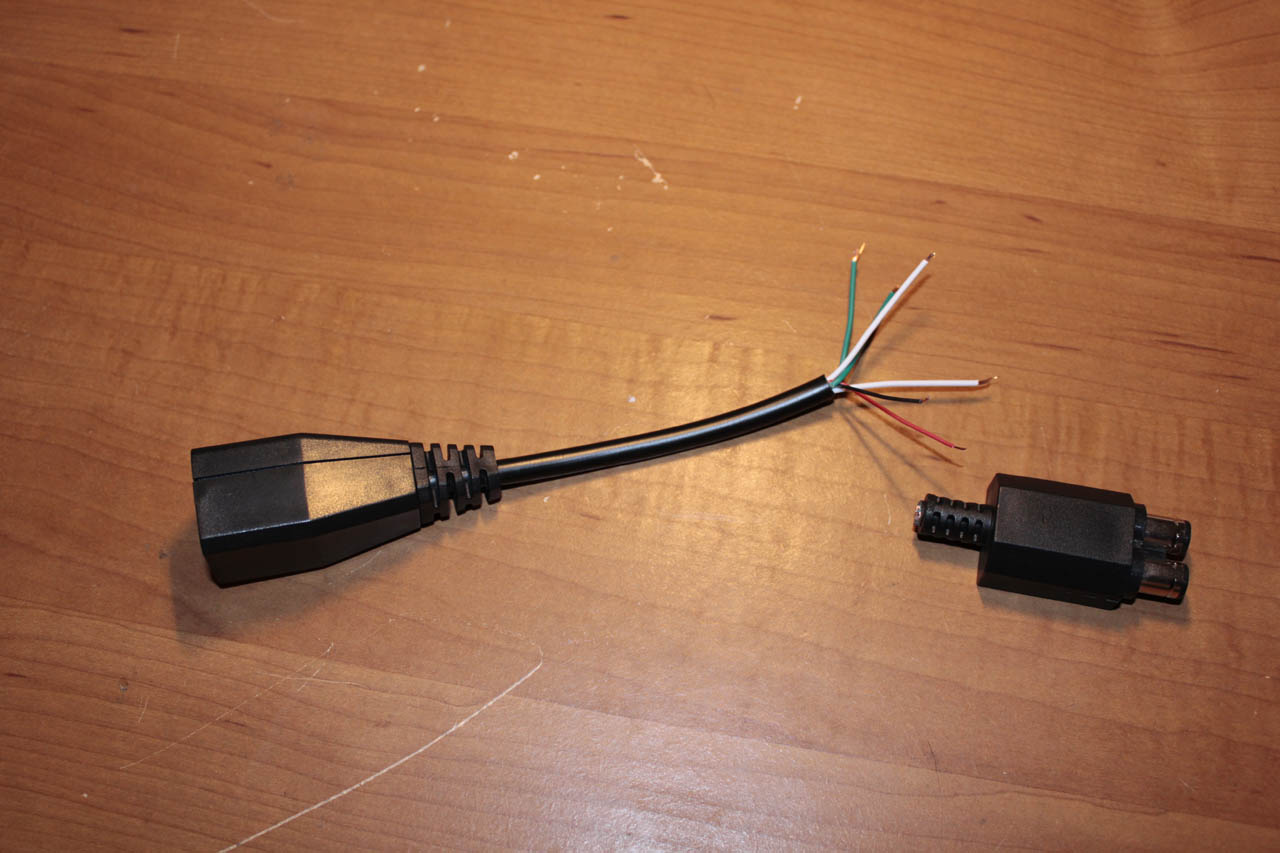
The XBOX-Slim adapter with the end cut off and inner wires stripped back and spread out.
So, it being an adapter, I knew it was going to be different on the inside than the original wiring. And so it was. The XBOX supply, as pointed out in the Instructables link I posted above, has 8 wires inside. This adapter has only 6, and they’re all differently colored. This is because the XBOX Slim doesn’t require as much power, so the adapter ignores the middle prongs of the XBOX head, sending its power through 4 wires instead of 6. The other two smaller wires are the +5v and “Jumpstart”, or “COMM” lines. After poking around with a multimeter a bit, I figured out where everything goes and made this fancy little graphic for visual people, like me.
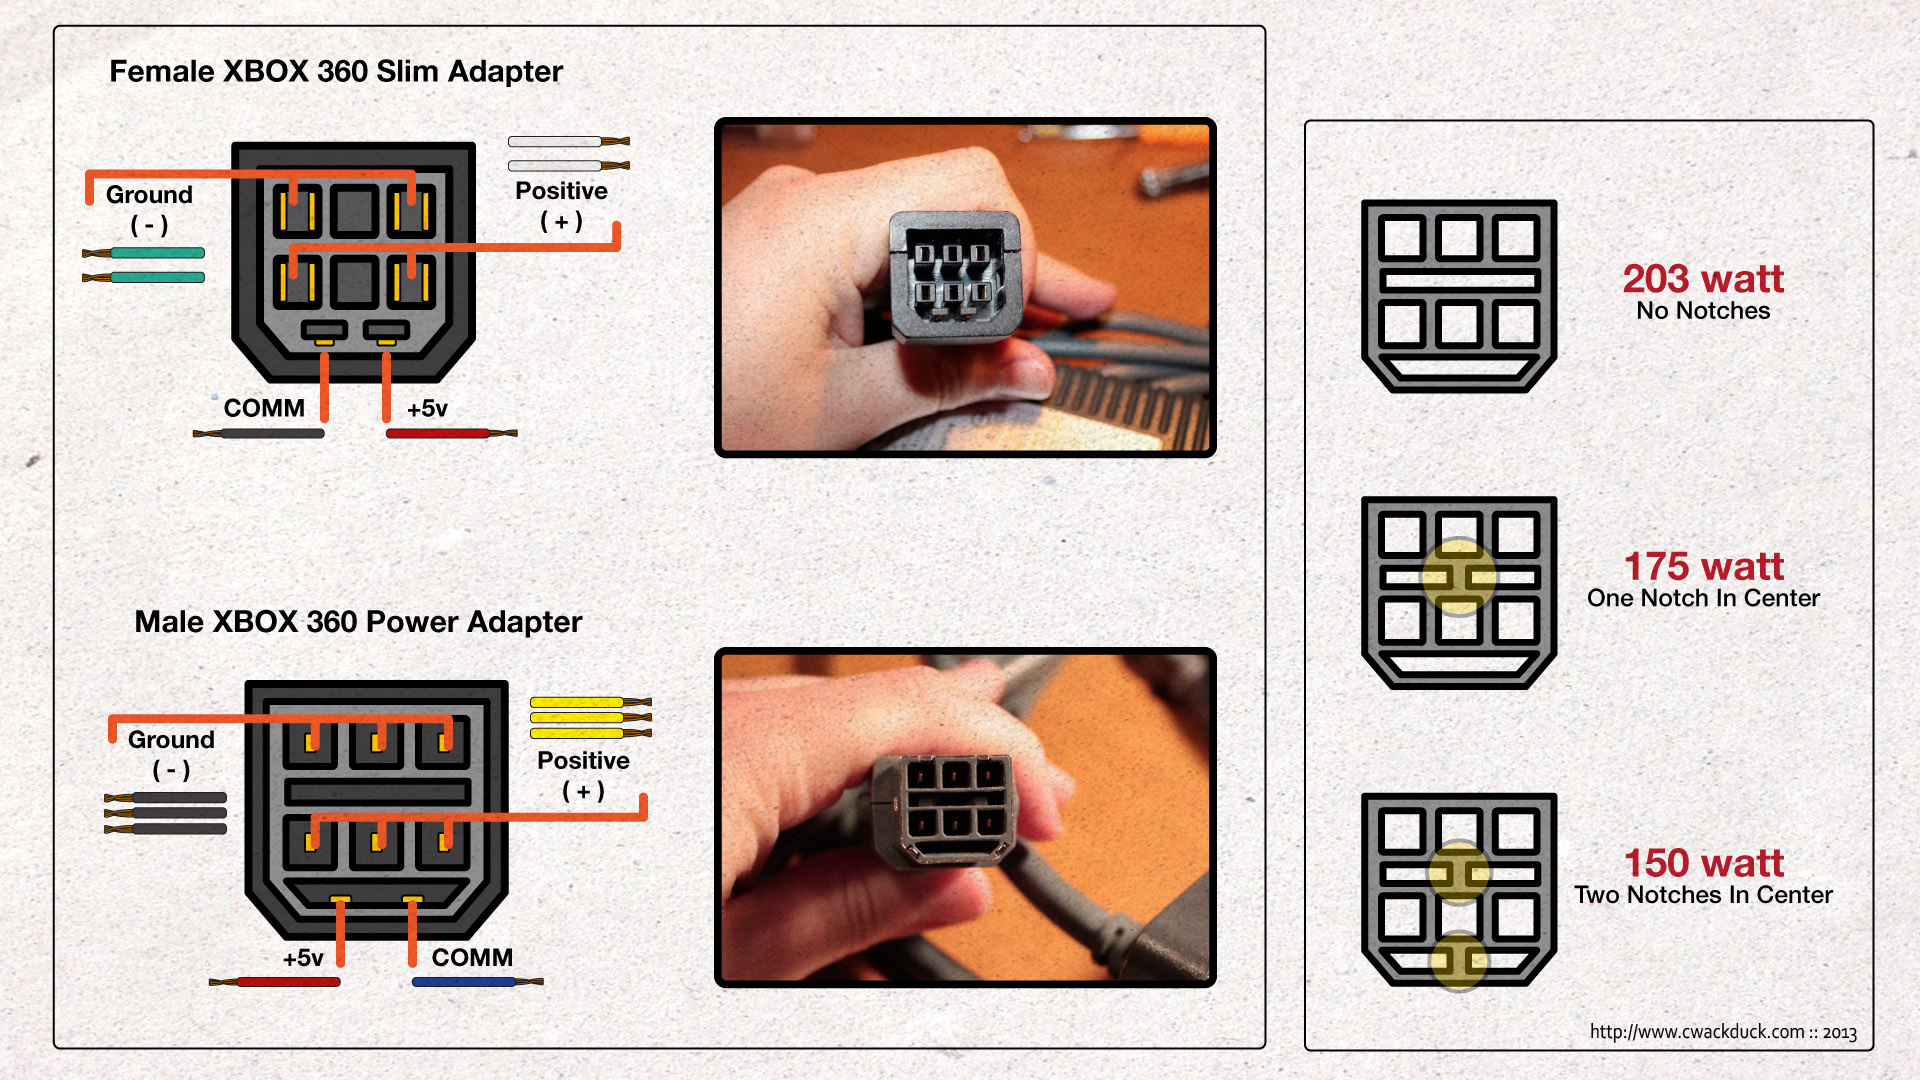
This shows the pin-outs for both the XBOX360 Power Supply plug and the XBOX-Slim adapter. Also, the quick way to identify the power rating of an XBOX power supply.
** Continuing from earlier: On the right of the image above is the quick way to identify what power rating a given XBOX supply is capable of. If you google around a little, you can likely find actual pictures that make it clearer, but I think this should help. No notch in the center, like mine shown in the bottom-center image, is 203 watts. 175 watts has a notch blocking the center horizontal section, and 150 watts has a notch blocking both the center and bottom horizontal sections. **
Note that in this image, I’ve included what you should expect the color of the cables to be if you skip the XBOX Slim adapter and just cut the head off of the Power Supply directly. While cleaning out the fan on my supply, I double-checked the color of the wires going to the board and they are the same in my Chinese version of the adapter as they are in the official Microsoft adapter. I can’t promise yours will look the same so always check your wires with a multimeter.
So after I’d figured out which prongs go to what wires, I decided to wire it up and see if I could get the power supply to come to life after it was plugged into the XBOX Slim adapter. First, I noticed I had done a crummy job and removing the outer wiring jacket and had cut into the colored jackets on the individual wires. So, just to be safe, I used heat-shrink tubing to cover the small holes I’d made…
Heat Shrink tubing from Harbor Freight has been incredibly useful for more than a few of my recent projects. I trust it to hold on more securely in the long-haul than regular electrical tape, and it looks more professional on a finished product, too.
So, that small inconvenience out of the way, I started hooking things up.
Now, as per the Instructables tutorial, to get power coming out of this thing there are three basic steps. Combine both negative wires into one. Combine both positive wires into one. Then short the +5v and the COMM lines together.
The XBOX360 power supply has a feature built in that only lets it turn on when it senses it’s plugged into something. It accomplishes this by using the COMM line and the +5v. The COMM line wants to see a steady 5 volts coming through it. If it’s not present it will not allow the power supply to turn on. So, all you have to do to meet that requirement is connect the +5v line to the COMM line. In the Instructables tutorial, the kid just twists these two lines together and calls it a day. This will result in a power supply that’s always on. That’s not quite what I’m after here so I will be using a simple switch in my design so I can turn the power on and off easily.
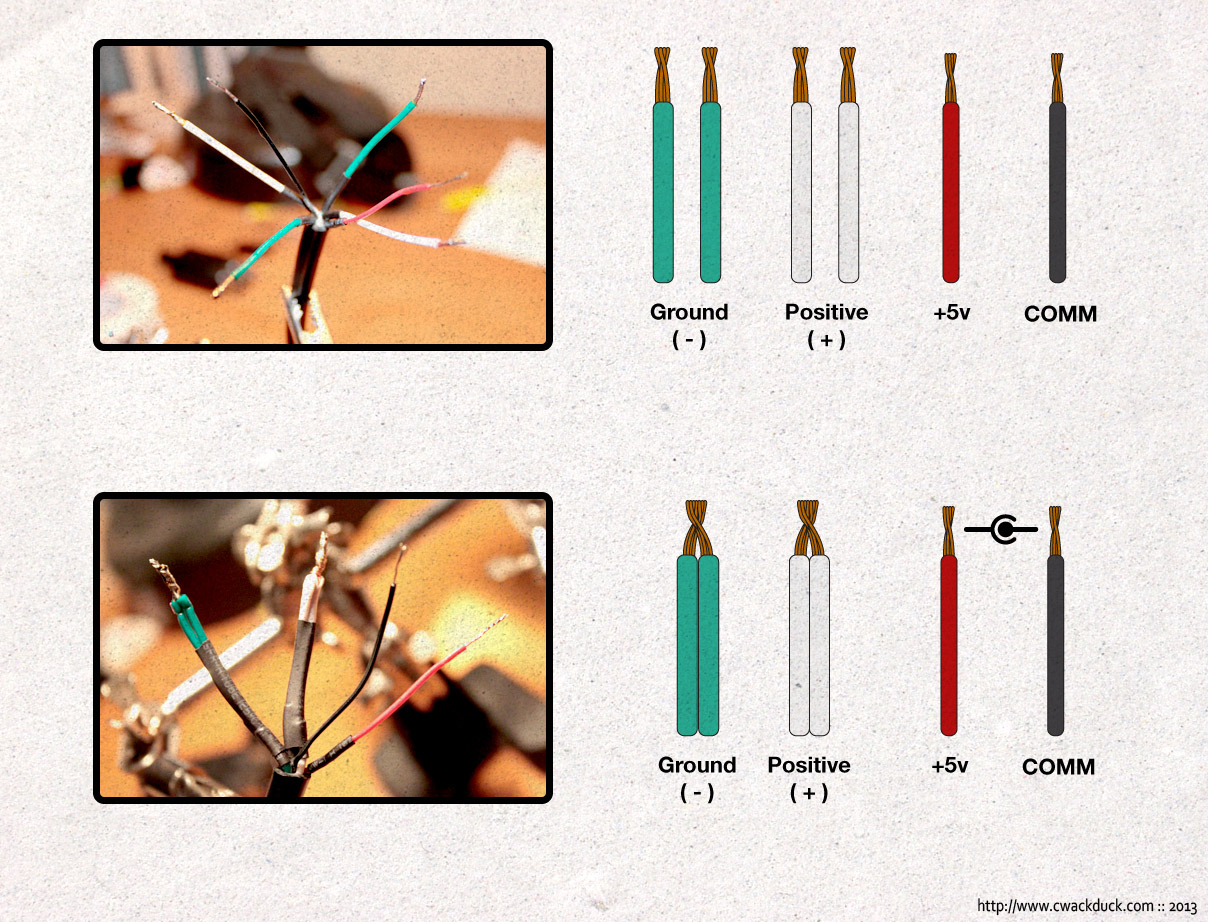
Here’s what you’ll need to do to prep the wires in the XBOX Slim Adapter for use.
To test your power supply, you just need to follow the instructions in the graphic above. With your multimeter, connect the Black Test Lead to the Green Wires and the Red Test Lead to the White Wires. Now, using a gator clip or some other way of shorting the wires (NOT YOUR BARE HANDS, DUMBY) connect the Red and the Black wires together.
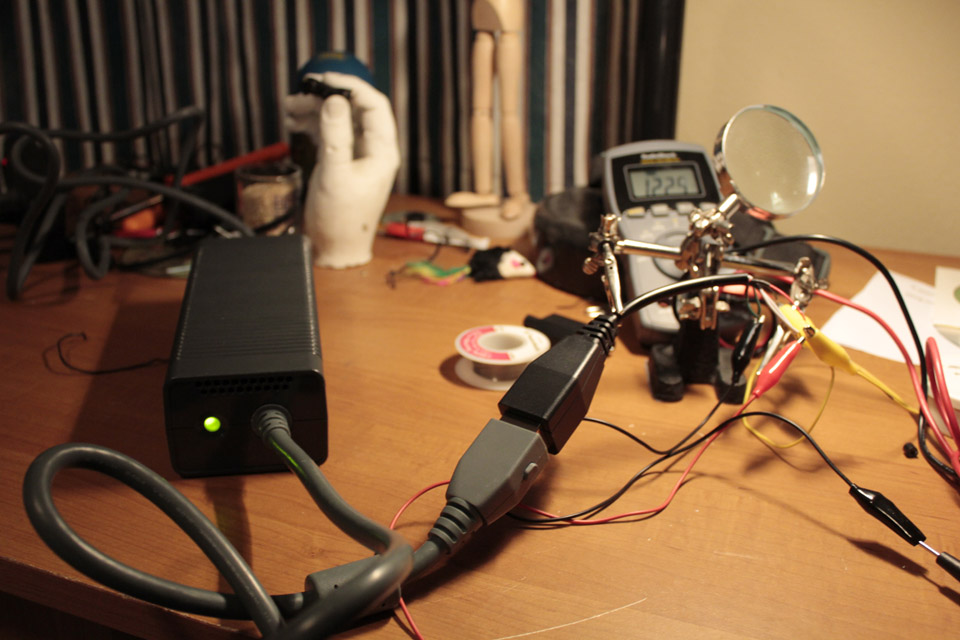
Once wired up, if everything is good, the Orange Standby light on the PSU should turn green and you should show a steady 12 volts on the multimeter display.
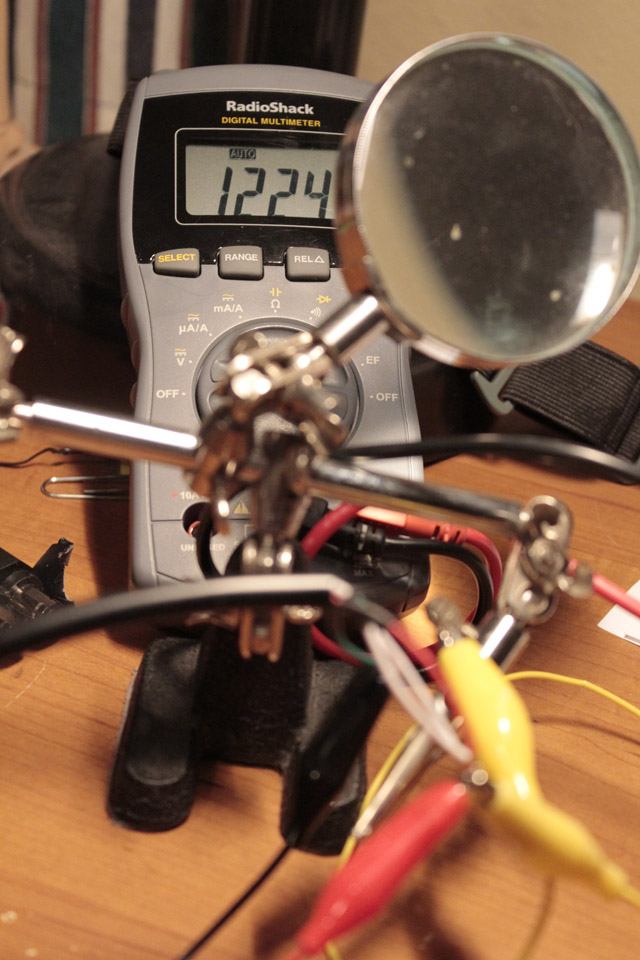
12.24 Volts under no load.
And that’s all there was to that! When I disconnect the +5v and the COMM, the power goes out and the voltage slowly discharges as the capacitors drain. Connect them again, and the power comes back right away. Seems to me to be a successful test!
So, to finish off the adapter now, until it’s ready to use, I just tinned the ends with solder to keep them from fraying and did a little more heat-shrink wrapping.

I tinned the ends to keep the two wires together, to keep them from fraying, and to make hooking the ends up to anything easier later.
Once tinned, I heat-shrink wrapped the pairs to keep them from pulling apart.
And that’s that for now.
*One thing to note about using the XBOX Slim adapter.*
Since the XBOX360 PSU uses three wires to transfer its full 16.5 amps, I’m still a little concerned about using the Adapter under a full load. The XBOX Slim only uses 10.25 amps. This is why the adapter only has pairs or two, not three, for power transmission. My multimeter only goes up to 10 amps for testing and I don’t currently have access to any equipment that can clearly handle a sustained 16.5 amps for testing.
I had an engineer at work help me test out the adapter’s ability to handle the full output. He rigged up a shunt resistor that, briefly, pulled what should have been 16 amps through the adapter. We had to unplug the power supply after about 8 seconds or we would have burned out the resistor. The resistor was extremely hot and would have burned a finger had I touched it. The wires on the adapter, on the other hand, were still cool to the touch.
What that tells me is that, at least for a short time, the adapter wires ARE capable of transmitting the full amperage of the power supply. At this point, I can’t guarantee they could over an extended time though. For now, I see no problem with using it for the printer without a heated bed. If I do choose to go with a heated bed down the line I would more thoroughly test the wires or skip the adapter entirely.
Well… Hopefully that answers some questions about using an XBOX360 power supply as a power source! I’ve tried to be thorough and answer any questions I found myself asking initially. If you have any questions, ask them in the comments below or click my G+ link at the bottom of the page and ask me there. Also, if you have anything for me to add or something I’m blatantly overlooking, let me know! The more knowledge I can build up about this in one place the better!
Leave a Reply to cwackduck Cancel reply
You must be logged in to post a comment.